REVIEW · ARUBA
Aruba Private Full Island Tour
Book on Viator →Operated by Chogogo Tours · Bookable on Viator
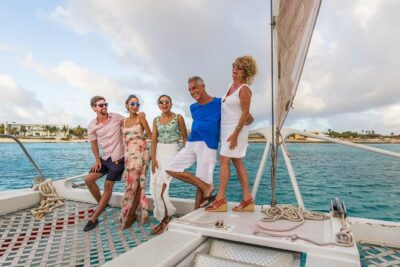
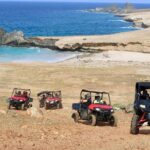
Aruba looks big from one quick road trip. I like that this is truly private for up to 4 people, so the pace stays comfortable and your guide can tailor small detours to your interests. You get a dedicated car, a set of island “greatest hits,” and the kind of stop-and-go timing that works well on a shore day or a short visit.
Second, I’m drawn to the balance of iconic views and oddly specific Aruba landmarks. You’ll hit the California Lighthouse area for coastline panoramas and then slow down at places like Ayo Rock Formations, where ancient rock paintings turn a roadside stop into a real sense-of-place moment.
One drawback to plan around: pickup and timing can get tricky when cruise ships are involved, and there have been cases of delays that pushed the start later than expected. If you’re tight on schedule, I’d confirm your meeting point and build in a little cushion.
In This Review
- Key highlights you’ll actually feel
- Entering Aruba: why a private full-island drive beats the rental-car scramble
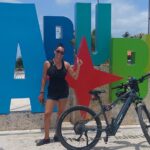
- Starting at Eagle Beach, Palm Beach, Malmok, and Arashi: fast orientation in the resort zone
- California Lighthouse and Sasariwichi Dunes: a short stop with big payoff
- Alto Vista Chapel: a hilltop pause that feels calmer than the coast
- Bushiribana Gold Mill ruins: sea views plus the story of the island’s gold rush
- Ayo Rock Formations and ancient rock paintings: why this stop sticks with you
- Frenchman’s Pass: coral cliffs, tight lanes, and the kind of view you can’t fake
- Savaneta en route: first capital vibes, plus Dutch base and Spanish lagoon scenery
- San Nicolas: street art, museums, and a more creative local core
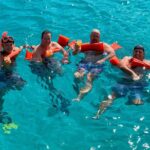
- Baby Beach: the calm half-moon that makes “time for a dip” actually happen
- Sero Colorado: the southernmost-point checkbox that gives the day a clean ending
- What the 4-hour timing really means for your day
- Guides and the human touch: what names like John, Diego, and David suggest
- Price and value at $360 per group: when this is a great deal
- Logistics to watch: pickup timing and weather
- Should you book this Private Full Island Tour?
- FAQ
- FAQ
- How long is the Aruba Private Full Island Tour?
- How much does the tour cost?
- Is pickup included?
- Is this tour private?
- What’s the ticket method?
- Which major stops are included?
- Are any admission fees included?
- Is there a cancellation option if plans change?
- What happens if the weather is bad?
Key highlights you’ll actually feel

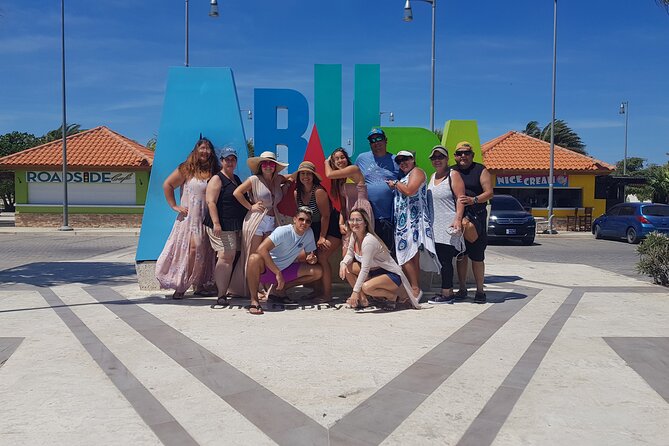
- Private group of up to 4: your day is less rushed and less crowded.
- North-to-south flow: Eagle Beach to San Nicolas to Baby Beach keeps things efficient.
- Photo stops with purpose: lighthouse views, coral-cliff passes, and sea-facing ruins.
- Culture beyond the beach: Alto Vista Chapel and Savaneta’s colonial-era landmarks.
- Swim-friendly finale: Baby Beach’s shallow, calm water is built for an easy dip.
- Flexible guidance: guides like John, David, Diego, Michael Angelo, and Marilyn are repeatedly praised for being friendly and accommodating.
Entering Aruba: why a private full-island drive beats the rental-car scramble
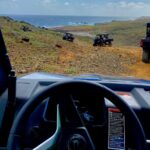
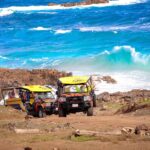
If you want to see Aruba’s variety—beaches, desert hills, fort-like ruins, and everyday local neighborhoods—this is a smart format. In about 4 hours, you cover a lot of ground without the stress of parking, navigation, and the “wrong turn” spiral.
A private tour also helps you slow down at the stops that matter to you. Some groups go big on views and photos; others focus on quiet cultural stops like chapel viewpoints or old industrial ruins. Either way, your guide isn’t working around strangers’ timing.
You can also read our reviews of more private tours in Aruba

Starting at Eagle Beach, Palm Beach, Malmok, and Arashi: fast orientation in the resort zone
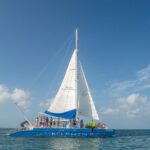
The day kicks off with a scenic run along the Eagle Beach, Palm Beach, Malmok, and Arashi stretch. It’s not just pretty driving—this is your quick orientation to Aruba’s coastline mood: bright water, low-rise resorts, and that Caribbean-in-arid-land contrast that makes Aruba feel instantly different.
From there, you’re not guessing where to go first. You’re already in “Aruba mode,” with the route set to take you from iconic north shore scenery toward inland and then down to the south.
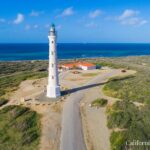
California Lighthouse and Sasariwichi Dunes: a short stop with big payoff
One of Aruba’s most recognizable landmarks comes early: the California Lighthouse and the surrounding coastal views near the Sasariwichi Dunes. It’s scheduled for about 15 minutes, which is perfect for getting the shot, taking in the horizon, and letting the salt air do its job.
Admission for the lighthouse stop is listed as included, so you don’t have to hunt for tickets while you’re already eager to look. The practical tip here is to treat this like a “view and reset” moment: water, sunscreen, and a quick photo round, then move on.
Alto Vista Chapel: a hilltop pause that feels calmer than the coast
Next up is Alto Vista Chapel, up on the hills above the north shore. The stop is brief (about 10 minutes), but chapel stops often work best on tours like this—short, quiet, and a good change from road-and-beach scenery.
The chapel admission is listed as free. Even if you’re not religious, it’s worth stepping out and looking across the island from up high. It’s one of those places that helps you understand why Aruba communities built landmarks where they could be seen from far away.
Bushiribana Gold Mill ruins: sea views plus the story of the island’s gold rush

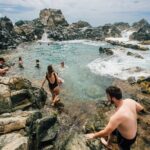
At Bushiribana Gold Mill Ruins, you get something Aruba does well: weathered leftovers with dramatic setting. The ruins are accessible on foot and face the sea, which means you’re walking in open air with ocean views instead of wandering through a closed exhibit.
This stop is scheduled for about 15 minutes and marked free. The downside is also real: since it’s a ruin you access by walking, wear shoes with decent grip if you’re sensitive to uneven ground. The upside is you’ll likely spend more time taking in the coastline than reading details—because the view does the talking.


Ayo Rock Formations and ancient rock paintings: why this stop sticks with you

Then comes Ayo Rock Formations, where the scenery turns almost cartoon-simple: big rock shapes, small pathways, and ancient rock paintings. The tour framing here is a standout for me because it changes the usual “stop, photo, leave” pattern.
Expect to see those rock paintings while you’re in the middle of the formations, not behind glass. This is the kind of stop that makes Aruba feel older than the resorts. It’s also one of the places where a little patience pays off—slow down, look up, and let the art and shapes come together.
Frenchman’s Pass: coral cliffs, tight lanes, and the kind of view you can’t fake

Frenchman’s Pass is a narrow passage tucked between coral cliffs in the Balashi area. It’s one of those spots where the real attraction is the geometry: the way the cliffs pinch the space and funnel your eye to the water.
This stop doesn’t have a stated admission fee on your itinerary details, and it’s the type of location where a quick photo walk can turn into a longer look. If you’re prone to feeling uneasy around narrow paths or uneven footing, take your time and use the railings/edges where available.
Savaneta en route: first capital vibes, plus Dutch base and Spanish lagoon scenery
On the way to San Nicolas, the drive routes through Savaneta, Aruba’s first capital. You’ll pass a Dutch Marine Base, the Spanish Lagoon, a reef island, and the mangrove woods of Mangle Halto.
What I like about this portion is that it’s informational without turning into a lecture. The sights are varied enough that you get to see Aruba’s influences shift over geography—colonial-era structures and water-world features side by side. For anyone who’s only seen Aruba from the resort road, this is where the island starts to feel lived-in.
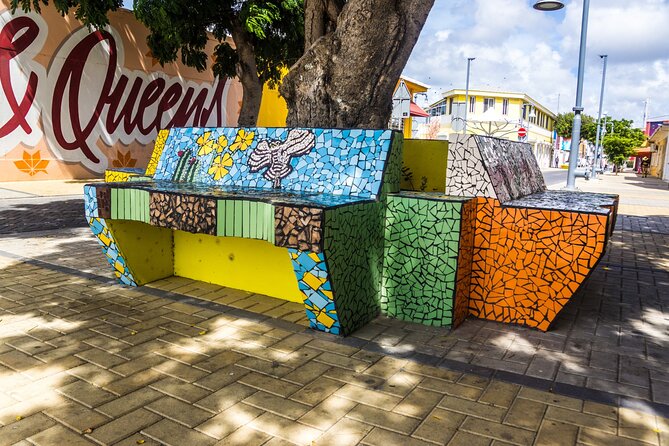
San Nicolas: street art, museums, and a more creative local core
Arrival at San Nicolas is a nice pivot from scenery into neighborhood energy. Your stop here is about 20 minutes, and it’s described as Aruba’s most creative and culturally diverse area.
The itinerary notes local culture points like street art, museums, and an arts & crafts gallery, plus the general sense of an area where people create rather than just shop. The practical move is to pick one or two things to do fast: a quick walk for street art, then a look at crafts or a museum, depending on your group’s mood.
If your group likes food or browsing, this is the moment to decide what you want before you’re back in the car.
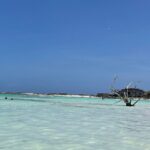
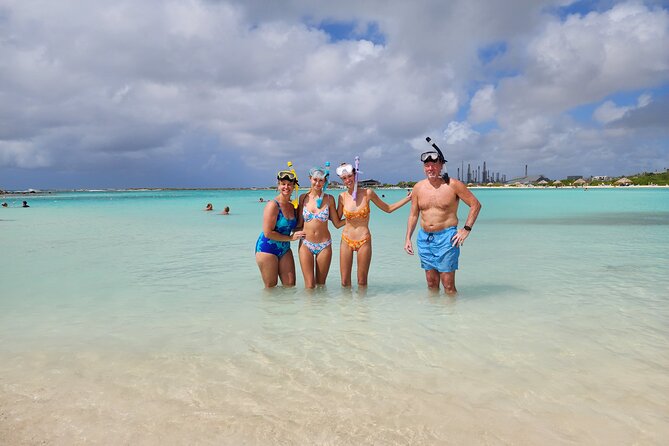
Baby Beach: the calm half-moon that makes “time for a dip” actually happen
Finish strong with Baby Beach, known for its shallow, half-moon sandbar feel. The water stays shallow for a long distance, which is exactly why it works for families and for anyone who wants a relaxed swim without white-knuckle waves.
This stop is scheduled for 15 minutes and is marked free. Even with a short visit, it’s long enough to rinse off, test the water, and decide if you want to extend your beach time on your own after the tour ends. Bring swimwear if you can—this is the most swim-ready stop on the route.
Sero Colorado: the southernmost-point checkbox that gives the day a clean ending
The tour summary also includes a stop at Sero Colorado, Aruba’s southernmost point. Even without a detailed timing block in the stop list, it’s a strong “end of the island” feeling marker that helps you understand the island’s shape and coastline direction before you head back.
If you’re the type who likes geography—where the land points, how the coast curves—that last stretch is a good cap. It also gives you an easy final photo backdrop before the day wraps up.
What the 4-hour timing really means for your day
A tour like this is built on short, efficient stops. You’re moving at a pace that keeps the full island feeling “complete,” but you’re not meant to linger for hours inside any single site.
That’s why it works best if you go in with clear expectations:
- You’ll get snapshots and viewpoint time, not marathon hikes.
- You’ll see a blend of icons and culture, not just beaches.
- You’ll likely spend most of the day in the car—so choose a seat and plan for the sunshine.
If you run tight on time (cruise day, family schedule, or travel fatigue), this structure is a plus.
Guides and the human touch: what names like John, Diego, and David suggest
This is a private tour, and the guide matters. Recent guest notes repeatedly call out guides such as John, David, Diego, Michael Angelo, and Marilyn for being personable, friendly, informative, and accommodating.
In plain terms: you want a driver who can explain what you’re seeing while also reading your group. That’s exactly what these named guides are credited for—especially when someone needs extra help or a moment of flexibility.
Price and value at $360 per group: when this is a great deal
The price is $360.00 per group for up to four people. That’s not “cheap” in the way a bus ticket is cheap, but it’s often a better value when you split it and compare it to the cost of renting a car plus the time you’ll lose figuring things out.
Here’s the math that usually makes sense:
- If you’re a couple, you’re paying for convenience and private pacing.
- If you’re a family of four or a group of friends, the per-person cost drops fast while you keep the private feel.
- If you don’t want to drive yourself, you’re buying back energy for beaches and enjoying the stops.
One more value point: admissions are included where listed, including the California Lighthouse, and multiple key sites are marked free. That helps you avoid the “small fees add up” problem that can happen on self-guided days.
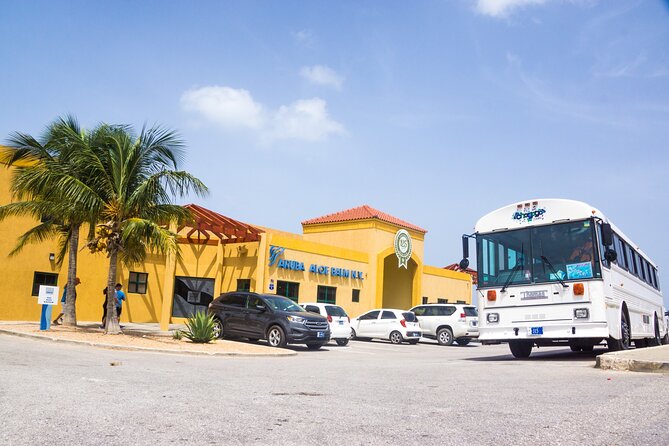
Logistics to watch: pickup timing and weather
Your itinerary says pickup is offered, and you’ll use a mobile ticket. That’s convenient, but the practical lesson from real-world cruise timing is to plan for variability.
There has been at least one case where paperwork and port access issues created a delay (with a later start accommodated). Another case described extra hassle about where the driver could pick people up dockside. The takeaway: confirm pickup details the day before and keep your meeting point clear in your mind.
Finally, the experience requires good weather. If conditions are poor, you should expect a different date or a full refund offer.
Should you book this Private Full Island Tour?
Book it if you want a tight, high-coverage day that moves from north shore icons to inland history to a relaxed beach finish. It’s especially attractive if you’re traveling as a small group, don’t want to drive, and you like your Aruba with a side of culture—not just sand.
Skip it or reconsider if your schedule is razor-thin and you can’t tolerate possible timing hiccups around cruise-port access. Also, if you hate walking at all, remember that some stops (like the ruins area) involve getting out and walking on site.
If you want the feeling of seeing more of Aruba without running your own logistics, this tour is built for you.
FAQ
FAQ
How long is the Aruba Private Full Island Tour?
It lasts about 4 hours.
How much does the tour cost?
The price is $360.00 per group for up to 4 people.
Is pickup included?
Pickup is offered.
Is this tour private?
Yes. It’s private, so only your group participates.
What’s the ticket method?
You’ll receive a mobile ticket.
Which major stops are included?
The tour includes the California Lighthouse and Sasariwichi Dunes, Alto Vista Chapel, Bushiribana Gold Mill ruins, Ayo Rock Formations, Frenchman’s Pass, San Nicolas, Baby Beach, plus a visit to Sero Colorado and passes through Savaneta with landmarks like the Dutch Marine Base, Spanish Lagoon, reef island, and Mangle Halto.
Are any admission fees included?
The California Lighthouse admission is listed as included. Alto Vista Chapel and Bushiribana Gold Mill Ruins are listed as free. Other stops shown are marked free where listed.
Is there a cancellation option if plans change?
Yes. Free cancellation is allowed up to 24 hours in advance for a full refund.
What happens if the weather is bad?
The experience requires good weather. If it’s canceled due to poor weather, you’ll be offered a different date or a full refund.